
Whether you have a LEGO Mindstorms or a LEGO Spike, robots are so much fun! Just use your imagination to create your own robotic invention!
We had so much fun building a ballerina robot using an EV3 to control her dance and play her music. We named our robot “Minnie Fay,” after a character from the musical Hello Dolly!. We love ballet, and we thought that it would be fun to build a robot dancer! Robots can be anything that you have an interest in!
We have programmed the ballerina to play some classical music and dance along. She can turn around, open/close her arms, and move each of her legs separately in time to the music.
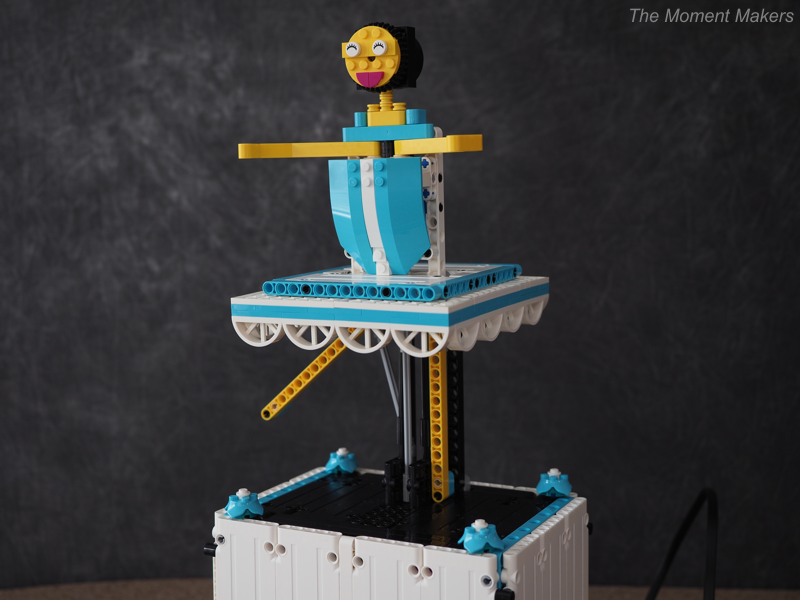
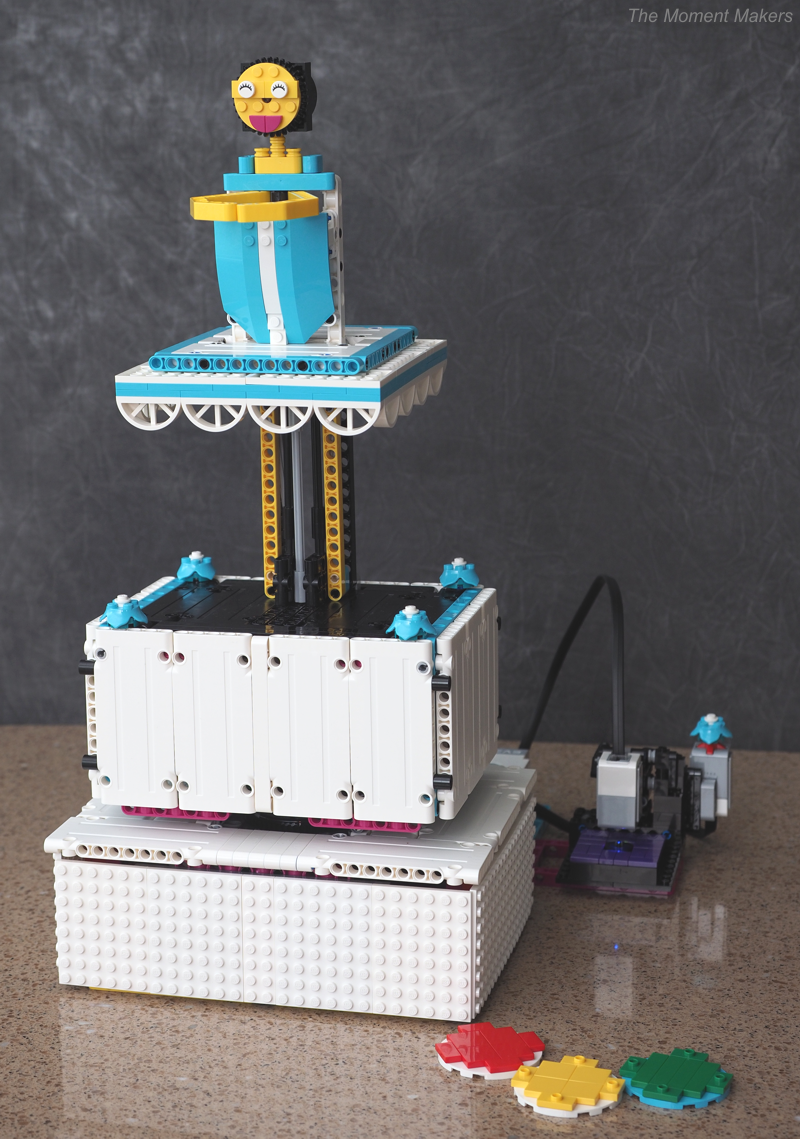
Our ballerina robot, including her full body and stage, turntable base, and record player:
Dancer Movement
We used an EV3 for our robot, since that was what we had available at the time. However, the SPIKE Prime or the Mindstorms Robot Inventor might actually work better since the newer motors are more compact. In our build, the body-movement motors are each EV3 medium motors: one medium motor facing up to open and close her arms, and two medium motors connected to piston-like mechanisms to raise her legs to multiple heights.

Arms
Because we had limited motors and ports, we decided to use only one motor for both of the arms. We did this using a worm gear. The motor is connected directly to the yellow plate on the underside of the stage (see above), with the motor’s axle pointing upward through the stage.
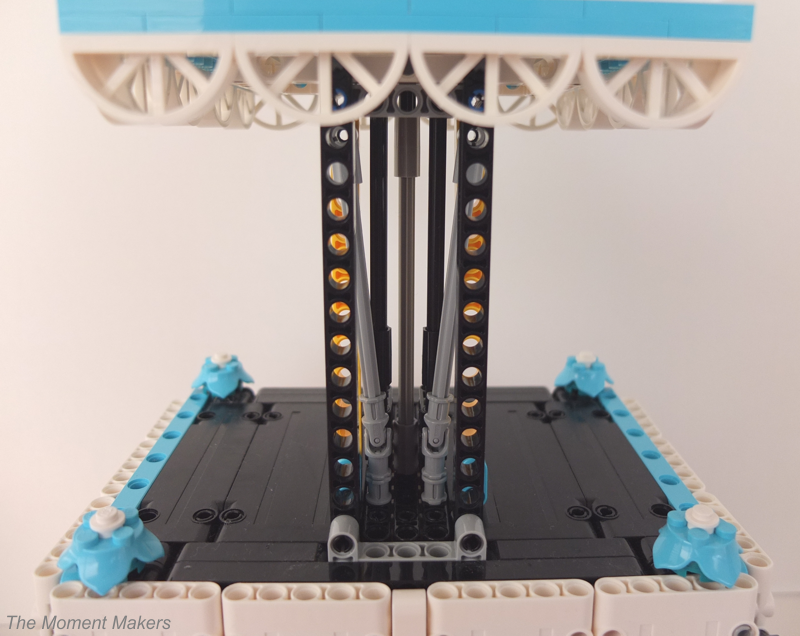
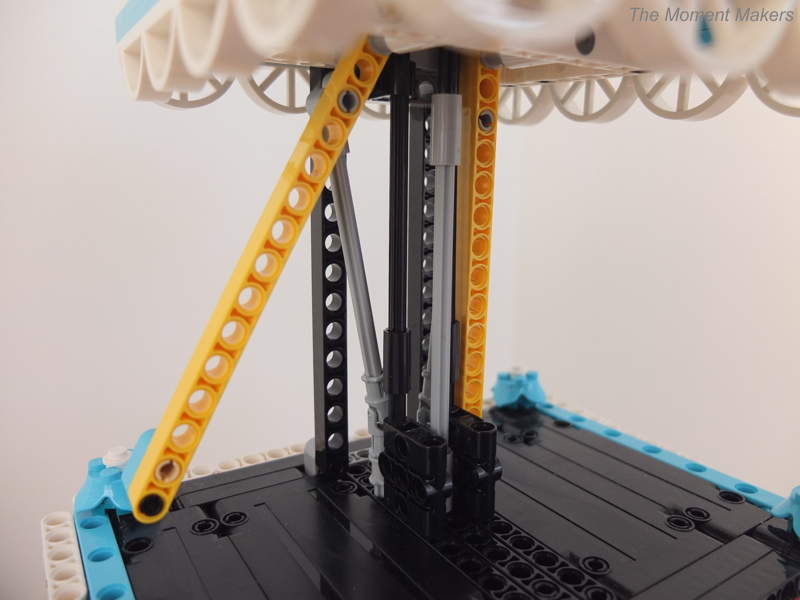
Then this axle continues up past the legs towards the dancer’s torso. You can see the axle in the picture below showing the back of her legs. The axle connected to the motor is the gray one straight up the center.
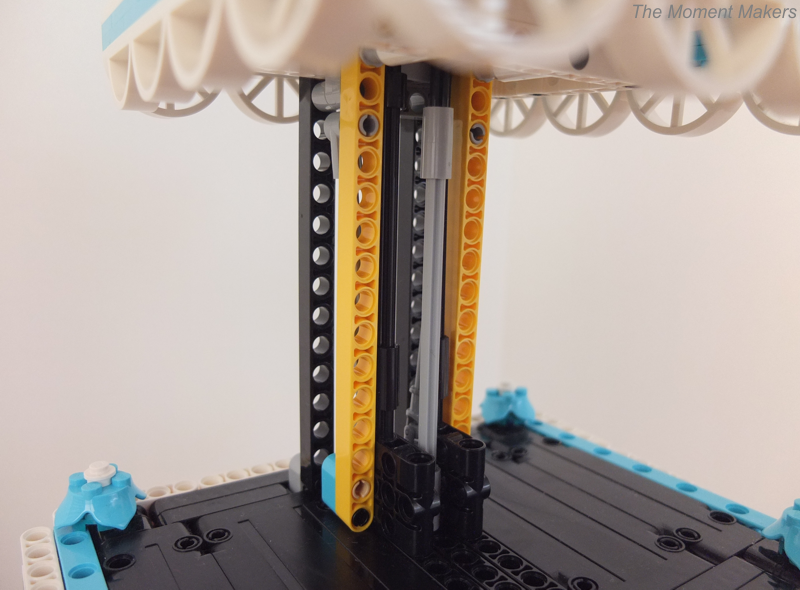
The axle continues up until it reaches the dancer’s back. You can see in the picture below that the axle (inside the white tubes used as spacers) is attached to a short worm gear (piece #27938). The short worm gear turns a big double-beveled tan gear, which turns two small single-beveled tan gears (one connected to each arm). When the motor turns, both of the arms will move (open or close) at the same time.

Although the arms have some slippage with this gear configuration, the mechanism still works very well for this simple esthetic mechanical purpose (instead of precise or weight-bearing).
We coded our dancer with EV3-Lab/EV3G block-based programming. In this software, we made a MyBlock to make Minnie Fay open/close her arms. Below, you can see the parameters on the left, and a math block and motor block on the right. The first input determines the speed and direction (open/close) to move her arms. This input plugs straight into the speed port on the motor block. The second input determines how much to move her arms (from a scale from 0-1). This input is plugged into a math block to determine how much her arms much open/close exactly. The “850” value in the math block refers to the fact that the maximum number of degrees of motor rotation for the arms to fully open/close is 850 degrees. After the product is found, it plugs into the degrees port on the motor block.

Legs
You can see below the piston mechanism for the right leg. The motor’s axle is directly connected to a small double-beveled black gear, which turns a small transverse single-beveled tan gear. The tan gear is connected to an axle, at the end of this axle is an axle to axle multi-direction (piece #32039) piece. The multi-direction piece is then connected to a universal axle joint (piece #61903). When the motor turns, the multi-direction piece turns, and then the universal axle joint is pushed up, raising the axle on top of the stage.

Below, you can see what the mechanism looks like when the leg is raised:

Below is a picture of the leg in a still, standing position.
Below, you can see near the bottom of the stage another universal axle joint. When the axle raises like this, it pushes up the joint, kicking the leg out to the side.
We made another MyBlock to make Minnie Fay kick. Below, you can see the parameters on the left, and a math block, a switch block, another math block, and a motor block on the right. The first input (with the scale symbol) controls which leg is being kicked (right leg, left leg, or both) by using a switch block. The second input controls the speed and the direction (opening or closing) of which the leg should move (by plugging into the math block to find the correct speed, and then plugging into the motor block speed port. The third input decides how high the leg must be raised, by plugging into a math block to find the right number of degrees to turn the motor (for the legs, we discovered that 32 degrees was a full leg raise/lowering), and then plugging the math block result into the motor block.
We encountered one difficulty when trying to use the “both legs” version of the kick. Since we used a slightly different build to move the left leg versus the right leg (due to space constraints under the stage), the legs actually move at slightly different rates, so we decided to never move both of her legs at the same time (decided to omit making her “leap”).
MyBlock Combining Arms and Legs
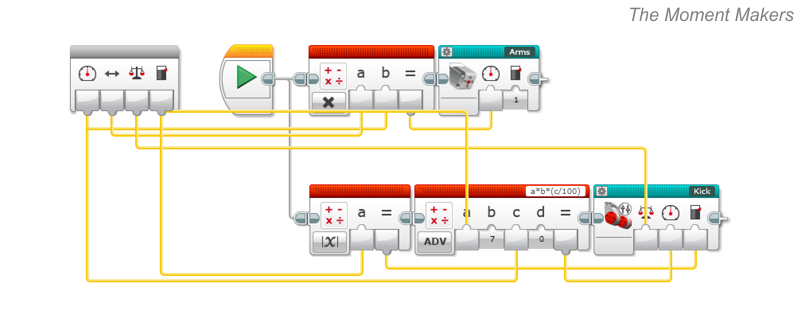
Below, is a picture of our MyBlock that can move the arms and legs at the same time. Some uses for this MyBlock include opening arms while kicking the left or closing arms while kicking the right leg (of course, these our only some examples). This MyBlock includes the parameters on the left with two parallel lines of code. The first line of code includes one math block and our Arms MyBlock. Our second parallel line of code includes two math blocks and our Kick MyBlock. In short, this MyBlock combines both the Arms and Kick MyBlock to happen at the same time.
Turning
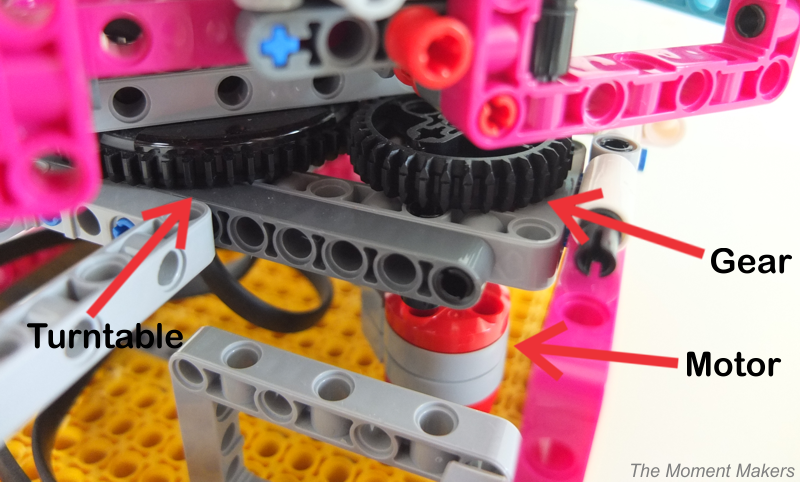
We used a large EV3 motor in the base of our music box robot to turn a turntable (pieces #18938 and #18939) that attaches to the upper part of our build, which houses her body-movement motors and also holding her body above.
Turntable base without white cover plates:

Since three of our motors reside in the upper part of our build that actually turns around, the wires for these motors go up through the hole in the LEGO turntable piece. As such, in testing we found that turning Minnie Fay too many times in the same direction resulted in the wires becoming too twisted and coiled. So, we only programmed her to turn once in one direction before “correcting” the wires by turning back in the opposite direction in the finalized dances.
With the panels removed, you can see the turntable connecting the rotating top to the base.
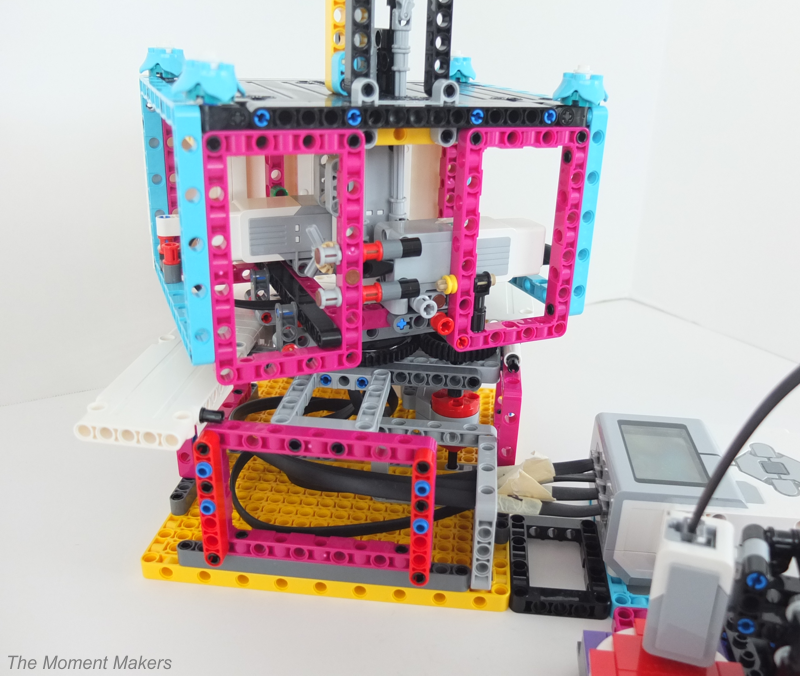
In this zoomed-in view, you can more easily see the large EV3 motor, whose axle connects to a large black gear to interact with the teeth of the turntable.
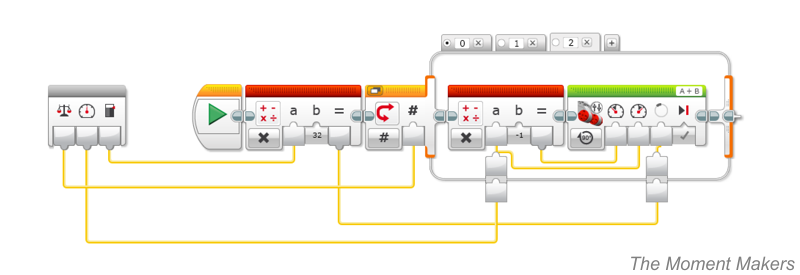
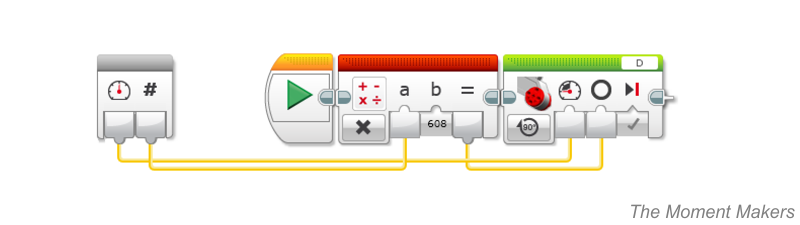
We made a MyBlock to control Minnie Fay’s turn. Below, you can see the parameters on the left, and a math block and motor block on the right. The input taken from the speed dial, simply sets the power for the turn. The input taken from the number/hashtag symbol (#), is how many turns that must be completed. This input is plugged into the math block to find how many degrees of the motor to turn (with “608” referring to how many degrees of motor rotation correspond to a full turn of the upper stage portion of the build). After the amount of degrees is calculated, the product is plugged into the motor block.
Music
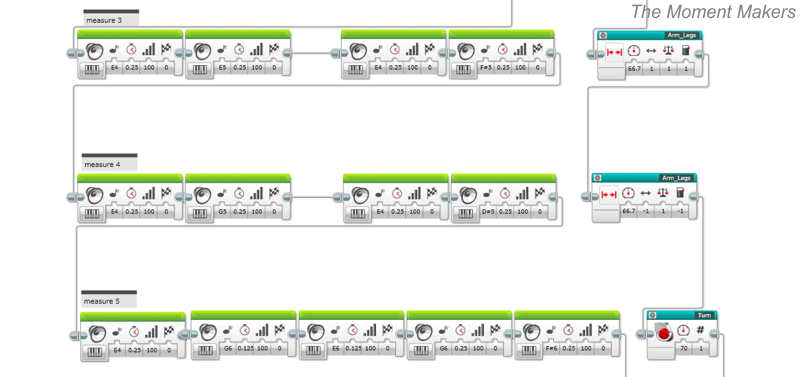
We used sheet music and converted the notes to individual sound blocks to make simplified versions of the songs “Tea” and “Dance of the Sugar Plum Fairy” from Tchaikovsky’s The Nutcracker. We made the dance movements parallel to the sound blocks to play the music and dance at the same time. Below, you can see an example of some sound blocks (green), and some movement MyBlocks that we made (blue).
Record Player
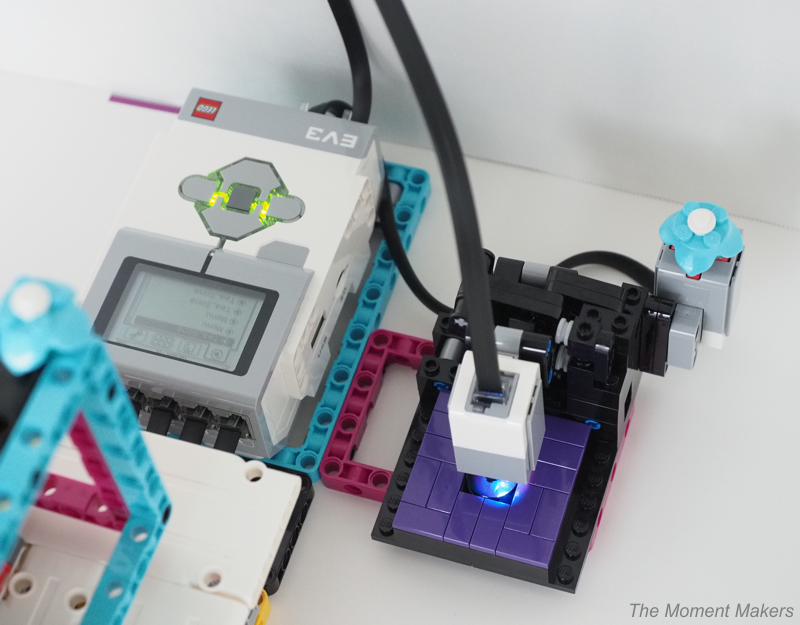
In order to allow the user to control the music/dance selection, we also created a “record player” using a color sensor and a touch sensor. Once the touch sensor is pressed, the color sensor will detect the color of each “record” disc placed underneath the sensor. The program plays a specific song and dance, depending on the color of the record the user selected. The red disc will start the song “Tea” from Tchaikovsky’s The Nutcracker. The green disc allows “Dance of the Sugar Plum Fairy” from Tchaikovsky’s The Nutcracker to play on the robot.
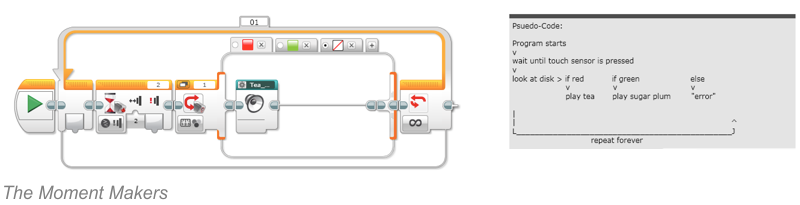
Below is our menu. It consists of an infinite loop, a wait until touched block, a switch block, and a MyBlock for each song. Everything in this program is placed in an infinite loop, so that it we continue repeating this program until the program is stopped. First, the program waits until the touch sensor is pressed. Next, it checks the color sensor to determine if the red or green disc is being used. Depending on the disc color, a certain song will be played. If the color sensor doesn’t see red or green, then it will do nothing. After each song is complete (or, if it sees nothing, after nothing happens), it will exit the switch block and repeat the program.
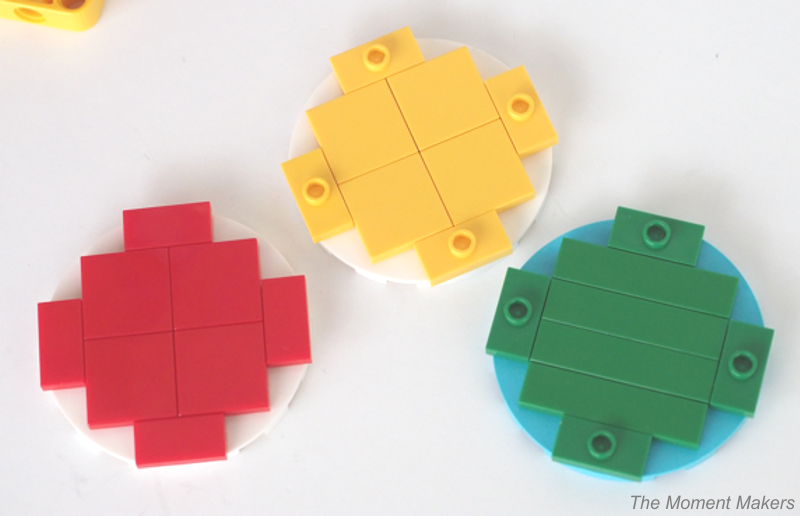
Below are the discs that we made to play each song. Currently, the yellow disc is not recognized by the color sensor since we have not had time to program another song/dance yet, but we are planning to program one later.
We have already programmed two songs and plan to add more! We loved making this robot because both ballet and robotics are things that are important to us. We hope to use this robot to inspire other girls to get excited about STEM and robotics. If you have any questions about our robot dancer, please contact us. What other fun projects have you made with your LEGO robotics? Let us know!

You must be logged in to post a comment.